Hey there, let’s cut to the chase. If you’re here, you’re probably either testing out a magnetic polishing machine for the first time, tired of machines that leave parts looking like they had a bad sandpaper job, or just trying to figure out what actually counts as “good polishing” when it comes to this tech. I’ve been on the supplier side of magnetic polishing machines for over 8 years now, and I can’t tell you how many times someone’s hit me up like, “Okay, it runs, but does it actually work?” So today, I’m gonna walk you through the real, actionable ways to measure polishing quality—no fancy jargon that’ll make your eyes glaze over, just stuff I actually use in my workshop every week. Magnetic Polishing Machine
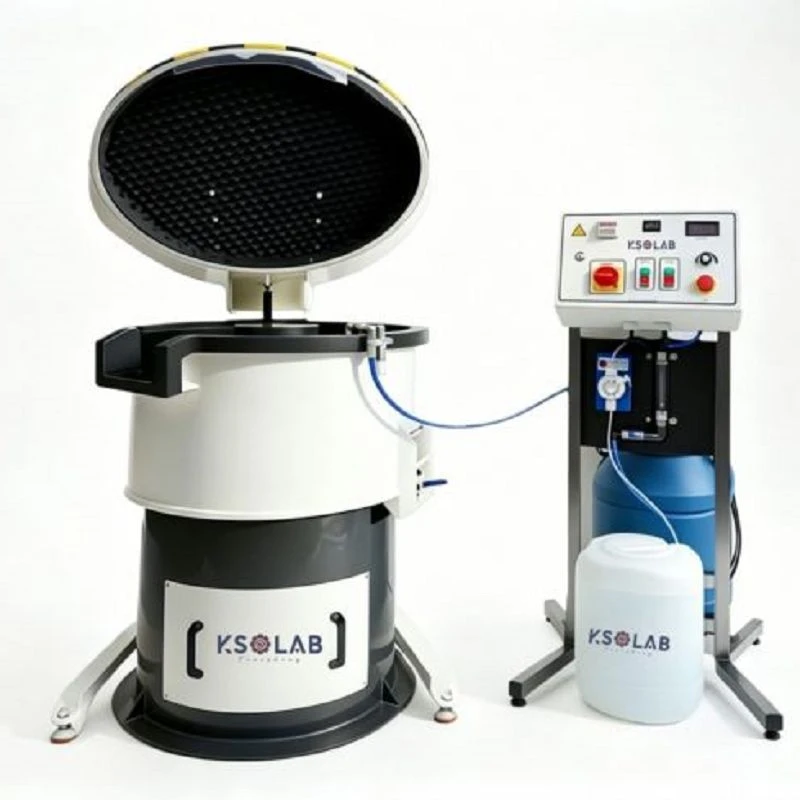
First, let’s make sure we’re all on the same page about what magnetic polishing even is, right? It’s not your grandma’s buffer with a cloth wheel—you toss tiny magnetic steel pins into a tank with your parts, turn on a magnetic field, and those pins swirl around, abrading (but not scratching) every nook and cranny, even the weird internal threads or deep grooves you can’t reach with a regular polisher. So measuring quality here isn’t like checking a car’s paint, where you just look at it; it’s a mix of visual checks, numbers, and actual functional tests for the part.
Let’s start with the most obvious one: surface roughness. But wait, don’t just grab any old roughness gauge—most people I work with skip the wrong part here. A lot of new buyers will use a generic contact probe and it’ll give you a number, but that number only matters if it’s measuring the right area. For magnetic polishing, you’re not worrying about a flat slab—you’re dealing with parts that have edges, crevices, maybe sharp corners that get rounded. So first, get a portable roughness tester (we keep a Mitutoyo one in-house, it’s not cheap but it’s worth every penny) and set the cutoff length correctly. The cutoff is basically how long the machine measures the surface to get an average—if you’re polishing a small medical screw, use a 0.25mm cutoff, not 2.5mm. If you’re doing a bigger part, adjust it. Then, test 3-5 different spots: the main flat surface, the edge, a grooved area, and a spot that’s hidden to make sure the pins actually got there. A good result here? It depends on your part’s needs, but for most automotive or medical parts, you’re looking for Ra (that’s the arithmetic average roughness, the number everyone uses) between 0.05 and 0.8 μm. If you’re polishing something more industrial, like a hydraulic valve, maybe up to 1.6 μm, but anything higher than that and you’re not getting the real smoothness magnetic polishing is supposed to deliver.
Next up, visual inspection—but not just squinting at it under your desk light. You need to use the right lighting and magnification, because scratches or micro-abrasions are tiny. We use a 10x digital magnifier (super cheap, like $50 on Amazon) and set it up under a bright, diffused light—no harsh overhead lights that cause glare. What are we looking for, exactly? First, are there any random scratches? Magnetic polishing shouldn’t scratch parts at all—if you see a scratch, either your pin size is wrong, the magnetic field is too strong, or you left the parts in too long. Second, what about dull spots? Sometimes parts have corners that the pins can’t reach, so a 10x will show you if there’s a hazy, unpolished area that you wouldn’t see with the naked eye. Third, edge rounding—magnetic polishing is great for taking those sharp, burr-edged parts and softening them evenly, not making one side round and the other sharp. You can measure edge rounding with a micrometer or the same digital magnifier—just compare the edge before and after polishing. For most parts, a good edge round is between 0.02 and 0.1mm, depending on the part’s use. Like, if you’re making a razor blade, you want a super consistent round edge, not one that’s sharp enough to cut a finger open.
Wait, let’s not skip burr removal—this is one of the biggest reasons people buy magnetic polishing machines, right? Burrs are those tiny, sharp metal bits left after machining or cutting parts, and if you don’t get rid of them, they can cause everything from a part that doesn’t fit to a machine that wears out fast. Measuring burr removal is trickier than it sounds, because most burrs are under 100 micrometers. We use a profilometer for this, but if you don’t have one, there’s a simple test: take a piece of tape (like 3M Scotch-bright, the low-tack one) and press it firmly against the part’s edge, then peel it off. If there’s any burr left, it’ll stick to the tape. Also, functional testing for burrs: if you’re polishing a part that goes into a hole, slide a matching pin or bolt through it. If it gets stuck, you still have burrs. If it slides in and out smoothly with zero resistance? That’s a win. I can’t tell you how many times a customer thought their parts were polished, only to slide a bolt through and get stuck—turns out the burr was still there, right in the thread, and magnetic polishing is great for threads but only if you run the machine long enough.
Another thing a lot of people sleep on: dimensional accuracy. Wait, how does polishing affect dimensions? Because those tiny steel pins are abrading the surface, right? So if you leave the part in the machine too long, you might remove too much material, which throws off tolerances. That’s a huge problem for parts that need to fit within 0.01mm tolerances, like medical implants or aerospace components. So before you polish, measure every critical dimension (use a micrometer, height gauge, or coordinate measuring machine if you have it), then measure again after polishing. A good rule of thumb: magnetic polishing should only remove 0.005 to 0.02mm of material per hour. If you’re seeing more than that, you’re either using too big pins, too strong a magnetic field, or running the machine too long. We always advise customers to do a test run first—polish a small sample part for 10 minutes, measure the dimension, then go from there, instead of dumping all your parts in and ruining a batch.
Oh, and let’s talk about surface defects that aren’t scratches—like staining or discoloration. Magnetic polishing works in a water-based solution, usually with some mild surfactant or rust inhibitor, but if your solution is old or the pins are dirty, you can get water spots, rust stains, or even chemical discoloration on the part. How to measure that? First, do a solvent wipe: take a cotton swab dipped in isopropyl alcohol and rub it on the part. If the swab picks up discoloration, you have a problem. Also, check for corrosion after polishing—if you’re working with aluminum or stainless steel, those are common issues, and they can ruin a part even if it’s smooth. Pro tip: we change our polishing solution every 50-60 hours of use, and we clean the pins weekly, so staining is almost never an issue for our customers.
Wait, are there any functional tests beyond burrs? Hell yeah. If you’re polishing parts that move, like gears or bearings, you need to test their friction. We use a simple friction tester (super basic, you can even rig one up with a spring scale) to measure how much force it takes to move two polished parts against each other. If the friction is too high, that means there are still micro-scratches or rough spots that’ll cause wear over time. For hydraulic parts, you might test leakage—if a valve is polished well, it shouldn’t leak when you put pressure on it. For jewelry or consumer products, you can do a salt spray test to check corrosion resistance, which is directly tied to polishing quality. A smoother, more uniform surface will hold up to salt spray way better than a rough one.
Let me share a quick real example to make this concrete. Last quarter, a customer who makes small automotive fuel injectors hit me up saying their magnetic polisher was garbage—parts were still scratched, and leaks were too high. We went through their process with them: they were using 3mm pins for parts that had 1mm internal passages, their polishing time was 2 hours, and they weren’t testing roughness at all. We walked them through the steps: use 1mm pins, run it for 45 minutes, test Ra, adjust, and after that, their parts hit Ra 0.3 μm, no scratches, and leakage dropped by 90%. The difference wasn’t the machine—it was how they were measuring quality.
Now, let’s wrap this up with what actually matters when you’re picking a magnetic polishing machine that works for you. All the measurements I talked about aren’t one-size-fits-all. If you’re polishing stainless steel cutlery, you don’t need a $20k CMM to check dimensions. If you’re polishing medical implants, you can’t skip roughness testing and dimensional checks. The key is to align your measurement method with what the part actually needs to do.
If you’re still confused about any of this—whether you’re testing a machine you already have, or shopping for a new one—hit us up. We don’t just sell machines; we help you set up your process, train your team, and make sure you’re getting the quality you need. No salesy nonsense, no hidden fees, just real advice from people who’ve been doing this for years.
Dry Polishing Machine Now, a quick note on references to back this up, so you know I’m not just making this stuff up:
- Tönshoff, H. K., et al. (2000). Magnetic Abrasive Finishing: Process and Applications. CIRP Annals, 49(2), 609-625.
- Bhushan, B. (2010). Springer Handbook of Nanotechnology. Springer, Chapter 14: Surface Finishing and Characterization.
- American Society for Testing and Materials (ASTM). (2017). Standard Test Method for Measuring Surface Roughness by Contact Stylus Instruments (ASTM D7127-17).
- Kalpakjian, S., & Schmid, S. R. (2019). Manufacturing Processes for Engineering Materials. Pearson, Chapter 26: Finishing Processes.
KS Lab Finishing Co., Ltd.
As one of the most professional magnetic polishing machine manufacturers in China, we also support customized service. We warmly welcome you to wholesale durable magnetic polishing machine made in China here from our factory. If you have any enquiry about pricelist, please feel free to email us.
Address: No.11-14, Yantian Shuibei Commercial Street, Fenggang Town,Dongguan,China
E-mail: sales@kslabfinishing.com
WebSite: https://www.kslabfinishing.net/
