If you’ve ever picked up a soda can, a water bottle, or even a jar of snacks from the grocery store, chances are you’re holding something made from PET resin—super common in packaging, and as a PET can supplier, I get asked all the time how that stuff actually gets made. Most people see the finished can on store shelves and think “plastic, that’s easy,” but nah, it’s a pretty precise, step-by-step process that balances chemistry, engineering, and enough quality checks to make sure your lemon-lime soda doesn’t leak or go bad before you open it. Let’s walk through it, like I’m explaining it to a buddy who works in a local café and keeps asking why “plastic cans” feel so much sturdier than the thin water bottles. PET Can

First off, let’s get what PET even stands for straight—polyethylene terephthalate, the same stuff that makes up those clear water bottles everyone uses. But the PET for cans isn’t the same as the flimsy bottle resin; it’s formulated to be thicker, more impact-resistant, and able to hold carbonation without leaking. The whole process starts with two core raw materials, right? PTA (purified terephthalic acid) and MEG (monoethylene glycol). I know, those names sound like something out of a high school chemistry lab, but they’re the building blocks. If I’m sourcing these, I make sure they’re food-grade—non-negotiable, because the resin will touch whatever goes into the can. No cutting corners here; one bad batch of raw materials and I’m dealing with thousands of defective cans later on.
The first big step is polymerization, which is basically the “gluing together” of those two chemicals to make long PET chains. Here’s how that works: we mix PTA and MEG in a big, heated reactor, heat it up to like 250°C (that’s over 480°F, hot enough to melt most metal), and add a catalyst—usually something like antimony trioxide, but don’t worry, the amount is tiny and gets bound up in the resin so it won’t leach into food. Early on, they react to make something called BHET (bis-hydroxyethyl terephthalate), then we crank up the heat and reduce the pressure to pull out excess MEG. This is where the long PET chains start forming; the longer the chains, the stronger the resin, so we have to monitor that super closely. Too short, and the can is flimsy; too long, and it’s impossible to mold. Once the resin is thick enough, we spin it into strands, cool it with water, cut it into little pellets, and bag ’em up—those are the PET resin pellets we use to make the actual cans. Fun fact: this part takes a few hours, not minutes. Rushing it here ruins everything.
Next up is preform molding, which is probably the step you’d recognize if you’ve ever messed with a hot glue gun—this is where those resin pellets get turned into the little bottle-like things you might have seen at a hardware store (short, cylindrical, with a threaded neck, like a tiny soda bottle without the body). As a supplier, this is one of my favorite steps because it’s where the raw pellets start to look like something we can actually turn into a can. First, we load the pellets into a hopper—just a big container that feeds them into an injection molding machine. The machine melts the pellets again (this time to around 280°C, hotter than polymerization) and injects the melted PET into a mold. The mold’s shape is that preform we talked about: a narrow neck with threads, and a thick, test-tube-like body. We cool the mold quickly with water, so the PET hardens right away, and then eject the preforms.
Here’s the catch: not all preforms are equal. We run a quick check on every batch—we look for tiny bubbles, uneven walls, or missing threads, because a preform with a wonky neck will never seal to a lid later. If a preform is even a little off, we toss it immediately, no exceptions. Last year, we had a small batch that had a weird air bubble in the bottom, and we caught it before they got to the next step—saved us from wasting hundreds of cans later. Those preforms get shipped to our facility (or, if we work with a co-packer, to theirs) for the final step: blow molding.
Blow molding is where that preform becomes the actual can. Think of it like blowing up a balloon, but with way more precision. We take the preform, heat it up just enough to make it flexible (not too hot, or it’ll melt), stick it into a can-shaped mold. Then we blast it with high-pressure air—like 400 to 500 psi, which is way more pressure than your car tire. That air makes the soft PET stretch and press against the inside of the mold, taking exactly the shape of the can: straight sides, a flat bottom (wait, no—wait, the “bottom” of a PET can is actually a little indented, right? That makes it sturdier when it’s full, so it doesn’t bow out), and the threaded neck stays exactly as it was in the preform, so lids screw on tight.
We also add a coating here, if it’s a carbonated drink can. PET is porous, meaning gases can seep through over time, so we line the inside with a thin layer of something called a barrier coating—usually an acrylic or epoxy-based coating, but again, food-safe. That stops the carbonation from leaking out and oxygen from getting in, which keeps the soda fresh. Some people think we do this because PET is “bad,” but no—without the coating, a soda would go flat in a week instead of months. We also add a thin coating on the outside if the client wants a printed design, which sticks ink so it doesn’t scratch off when the can is stacked in a warehouse.
Once the can is blown and coated, we do a ton of quality control checks. First, we check the weight—each can has to be within a few grams, because too light and it’ll be flimsy, too heavy and we’re wasting resin and making the can more expensive. Then we test the pressure resistance: we fill a few cans with water and crank up the internal pressure to see if they’ll hold, simulating what happens when a soda gets tossed in a hot car. We also check for leaks—submerge cans in water and pressurize them, any air bubbles mean a leak, and we toss those. And yeah, we do the visual check too—no smudges, no scratches on the print, no dents that might show up after shipping.
Wait, and let’s talk about sustainability, because that’s a huge thing right now. A lot of clients ask if we use recycled PET (rPET) for our cans. We do—for most of our lines, we use a mix of virgin and rPET, and some clients want 100% rPET. The process for rPET is a little different: we start with post-consumer plastic bottles, clean them, shred them, remove labels and caps, melt them down, and re-pelletize. The barrier coating is still needed for carbonated drinks, but rPET is just as good as virgin, as long as it’s processed right. We make sure all our rPET is FDA-approved for food contact, so no worries there.
I know this sounds like a lot, but it’s all to make a can that works. You pick it up, twist the lid, and it just works, and that’s because every step is tight. As a PET can supplier, I’m not just selling a plastic container—we’re selling something that keeps drinks safe, fresh, and easy to hold, while also being recyclable (PET is one of the easiest plastics to recycle, by the way).
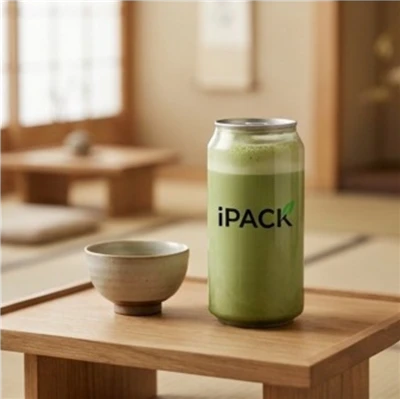
If you’re a brand owner looking for a reliable PET can that fits your product—whether it’s soda, iced tea, sparkling water, or something else—hit us up to chat. We can walk you through the options, from pre-molded sizes to custom prints, and make sure your cans are exactly what you need, no cutting corners on quality. Let’s connect and talk about your next project!
Single Wall Paper Cup References:
- "PET Resin Production and Processing." American Chemistry Council, 2022.
- "The Basics of Blow Molding for PET Packaging." Packaging Association, 2023.
- "Food Contact Safety for PET Packaging." FDA Center for Food Safety and Applied Nutrition, 2021.
Wuhan Xinyongan Industry and Trade Co., Ltd.
Address: No. 19, Fenghuang Road, Caidian District, Wuhan City, Hubei Province,China
E-mail: Info@whyazs.com
WebSite: https://www.ipackpartner.com/
